

Your Android phone is a powerful tool—and it also has the potential to be your most invasive spy. With cameras, microphones, location sensors, and always‐on connectivity, apps can quietly collect sensitive data unless you take control. In this post, we’ll walk you through seven essential privacy settings every Android user should enable (or disable) to keep their phone’s eyes, ears and whereabouts under control.
Specifically we’ll cover:
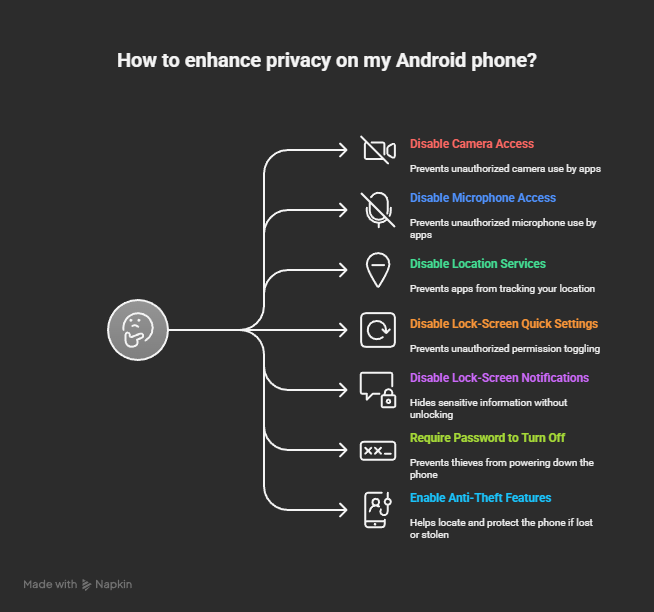
- Disabling camera access — only enable when you’re using the camera
- Disabling microphone access — only enable when calling or needed
- Disabling location — only enable when you need it (e.g., using maps)
- Disabling lock-screen quick settings (to prevent someone toggling permissions when locked)
- Disabling lock-screen notification content (to hide sensitive info without unlocking)
- Requiring a password to turn off the phone (so a thief can’t simply power it down)
- Enabling anti-theft & “Find My Device” features by Google (including when phone goes offline or is offline for extended time)
We’ll dive into real-world case studies, statistics, step-by-step instructions, and actionable advice so you can implement these protections today. Whether you’re a privacy-conscious user, work with sensitive data, or just want more control over your phone — this article is for you.
Introduction – Why It Matters
Imagine this: you install a seemingly harmless utility app, grant it “camera access so you can take a photo”, and it uses your camera or microphone in the background when you’re not aware. Or your location sensor is being polled by dozens of apps—even when you’re not using them. In fact, a recent study by IIT Delhi found that Android apps with precise location access were able to infer a user’s indoor/outdoor status, movement patterns, and even room layouts — all without camera or microphone access. (The Economic Times)
In short:
- Sensors like camera, mic, and GPS are extremely powerful and potentially revealing.
- Android (and other OS) permission systems have improved, but many users still leave broad access open.
- A stolen or lost phone with weak settings gives attackers an easy path to your data, identity, and location.
So let’s get ahead of it: by applying the settings below, you’ll greatly reduce the “attack surface” of your Android device.
1. Disable Camera Access — Only Enable When You’re Using the Camera
Why this matters
- The camera can capture photos or video without your explicit notice. Some apps request camera access for innocuous reasons (“take photo for profile”), but then misuse data.
- Starting with Android 12, you’ll see green dot indicators when your camera or mic is in use. (Android Open Source Project)
- According to one survey, 46% of popular Android apps request camera access. (security.com)
What you should do
Step-by-step (for most Android 11/12+):
- Go to Settings → Privacy → Permission manager → Camera. (Google Help)
- Inspect which apps currently have “Allow all the time”, “Allow only while using app”, or “Ask every time”.
- For apps that don’t need camera access all the time, switch to “Allow only while using the app” or “Ask every time”.
- For apps that you simply don’t use the camera feature for, choose “Deny”.
- To create a system-wide “toggle off” for camera access: On Android 12+, you can add a Quick Settings tile: Settings → Privacy → Camera & mic → toggle camera off. (Google Help)
Real-world example
You install a scanner app to digitize documents—fine. But later you notice it’s asking for “Allow all the time” on the camera. That means it could in theory activate the camera in the background. By switching to “While using app”, you limit it to only when you’re actively using it.
Tips
- Make sure you understand why the app is asking for camera access. If it’s a wallpaper app or a simple utility—and camera is not essential—deny it.
- Periodically check Settings → Privacy Dashboard (Android 12+) to see recent camera/mic usage. (Android)
2. Disable Microphone Access — Only Enable When Calling or Needed
Why this matters
- Just as the camera can spy on you visually, the microphone can pick up audio even when you think your phone is idle.
- Android gives you controls to see when mic is active, and to disable access. (Google Help)
- Many apps request microphone access for legitimate reasons (voice calls, voice commands), but few apps truly need constant mic access.
What you should do
Step-by-step:
- Settings → Privacy → Permission manager → Microphone.
- For each app, set permissions to “While using app”, “Ask every time”, or “Deny” if the mic isn’t needed.
- Consider adding a Quick Settings tile for Microphone toggle if your Android version supports it (Settings → Privacy → Camera & mic → toggle mic off). (Google Help)
Case study
Suppose you have an assistant app that listens for voice commands. That’s fine. But you also have another game or utility app that asked for mic access—switching that to “Ask every time” prevents continuous audio capture.
Tips
- Be mindful of apps requesting both camera and mic access—those are especially high-risk combinations.
- If you’re in a situation where you absolutely don’t want your mic active (e.g., sensitive meeting), use the mic-toggle in the quick settings to disable all apps at once.
3. Disable Location — Only Enable When You Need It (e.g., When Using Maps)
Why this matters
- Location data is extremely revealing. It can track your home pattern, routines, visits to sensitive places. The IIT study mentioned earlier shows how precise GPS data can infer your indoor/outdoor status, etc. (The Economic Times)
- Android lets you choose approximate vs. precise location, and while using the app, only once, or never. (Google Help)
- Many apps request “All the time” access even when they don’t need it.
What you should do
Step-by-step:
- Settings → Security & privacy → Permission manager → Location.
- For every app:
- If the app truly needs location only while you’re using it (maps, ride-share), set “While using app”.
- If it needs only once (e.g., check local weather), set “Ask every time”.
- If it doesn’t need location at all, pick “Deny”.
- For apps requiring “All the time” (e.g., anti-theft, device tracking), ensure you understand why.
- Bonus: Some Android versions allow you to use “Approximate location” instead of precise for certain apps. (Android)
Real-world scenario
A fitness tracker app requests “Always allow location” because it wants to track your runs. But if you only use it occasionally, consider switching it to “While using”. Meanwhile, a game that shows you ads based on location doesn’t need location access at all—deny it.
Tips
- Periodically check which apps have location access and when they last used it. Administrate via the Privacy Dashboard.
- For highly sensitive environments (e.g., you don’t want anyone to know when you’re in a certain place), disable location entirely when not needed.
4. Disable Lock-Screen Quick Settings (and Sensitive Toggles)
Why this matters
- The lock screen often allows quick toggles (WiFi, Bluetooth, camera, microphone, quick settings) that thieves or unauthorized users can exploit without unlocking the phone.
- If someone boots your phone or tries to access certain features from the lock screen, they might be able to turn off certain protections or toggle sensors.
What you should do
- Go to Settings → Lock screen → Quick settings / Shortcut (wording may vary by device).
- Disable sensitive toggles like “Allow quick settings while locked”, “Camera launch from lock screen”, “Mic access from lock screen”.
- Make sure the phone requires your PIN/password/biometric to access Quick Settings when locked.
- Test it: lock your phone and check if swiping down still shows quick toggles—if yes, tighten settings.
Real-world example
A phone with camera widget on the lock screen allowed someone to launch the camera, then use that to pivot to gallery or other menus. By disabling camera and quick settings access while locked, you reduce risk of side-channel exploits.
Tips
- Some manufacturers may hide these settings under “Security & privacy → More settings”.
- If your phone supports multiple users or guest mode, ensure quick settings for guest are also restricted.
5. Disable Lock-Screen Notification Content
Why this matters
- Lock-screen notifications can show message previews, email contents, or other sensitive data without unlocking the device.
- This means even if your phone is locked, someone can read your private messages or see personal info.
What you should do
- Settings → Notifications → On lock screen (or Lock screen → Notifications depending on UI).
- Choose “Hide content” or “Don’t show notifications” on lock screen.
- Optionally: Settings → Privacy → Notification content on lock screen and choose “Hide sensitive notification content”.
- Test: receive a message, lock your phone, see if lock screen shows the body of the message or just “1 new message”.
Real-world example
You get a work-email with confidential client data. The phone sits on a desk in a café. With message preview enabled on the lock screen, someone walking by glances and sees the client data. By disabling content, they only see “New message” instead of full body.
Tips
- Some apps allow in-app setting for notification previews—adjust those too (e.g., WhatsApp settings → Notifications → Show Preview on Lock Screen = Off).
- Combine this with secure lock screen (PIN/biometric) for full protection.
6. Require a Password to Turn Off the Phone
Why this matters
- If your phone is stolen or lost and the thief powers it off immediately, you lose tracking ability (like via Find My Device) and may lose control.
- Android hardware and some OEM interfaces allow or encourage requiring authentication before shutdown. This adds a layer of security so that even powering off requires your PIN/fingerprint.
What you should do
- Settings → Security & privacy → Power button behaviour (or similar).
- Look for “Require password to power off phone” or “Lock when power off” toggle.
- Enable it so that whenever someone tries to power down the phone, they must enter your lock screen credential first.
Real-world scenario
You lose your phone in a taxi. If a thief can immediately turn off the phone, you cannot locate it, wipe it remotely, or track it. With power-off lock enabled, they cannot simply turn it off—they must unlock the phone (which they likely can’t), so you retain tracking or remote wipe options.
Tips
- Make sure your lock screen credential (PIN/password/biometric) is strong—avoid simple 4-digit PINs.
- Also enable remote wipe on inactive or stolen device (covered in Section 7).
7. Turn On Anti-Theft & “Find My Device” Settings (Including Offline Mode)
Why this matters
- Even with camera/mic/location locked down, a lost/stolen phone is still a huge vulnerability: someone might extract data, impersonate you, access accounts, etc. Anti-theft features give you a last-line of defence: locate device, lock it remotely, wipe it, or sound an alarm.
- Find My Device by Google is built-in for Android phones; it allows you to locate, lock, or erase your phone remotely. (VeePN)
- Importantly, newer Android versions allow offline find (device can be found even when it’s offline or powered off) by leveraging other nearby devices.
What you should do
- Open Settings → Security & privacy → Find My Device (or Google → Security → Find My Device).
- Toggle “Find My Device” ON. Also ensure “Allow remote locate, lock & erase” is checked.
- Set “Remote lock” or “Lock device offline” if available in your Android version/OEM. Some devices call it “Lock when offline” or “Lock when SIM changed”.
- Under your Google account: Go to myaccount.google.com → Security → Your devices → Find the device → check settings.
- Test the feature: On another device sign in to your Google account → Find My Device → locate your phone → Try ringing/locking/erasing (don’t wipe unless you’re ready).
- Bonus: Enable device encryption, SIM-lock and strong lock-screen credential (PIN/password) so remote lock/wipe is actually effective.
- Offline mode: On supported devices you may find setting like “Allow this device to be located when offline” or “Unlock when no network”. Ensure it’s enabled if available.
Case study
A user lost their phone in a cafe. Thanks to Find My Device, they located the phone in standby mode. Before they could retrieve it, someone found the phone and tried to turn it on. Because “Require password to turn off phone” was enabled (Section 6), the thief couldn’t power it off. The user used Find My Device to lock the phone and display a message (“Phone lost – call 0123-456789”). The phone’s GPS was still sending location updates via nearby devices (Bluetooth mesh), and police used the info to recover it. Without those settings, the phone would have disappeared.
Tips
- Keep the Google account recovery / 2-step verification strong—if someone accesses your Google account, they may disable anti-theft features.
- Make sure you note down your device’s serial number and IMEI; this helps police/phone-carrier in theft recovery.
- Regularly review your device list in Google account; remove old devices, enable alerts for unknown devices.
Table of Settings at a Glance
| # | Setting | Why Important | Recommended Configuration |
|---|---|---|---|
| 1 | Camera Access | Prevent stealth video/photo capture | “While using app” or “Ask every time”; Quick-Toggle OFF |
| 2 | Microphone Access | Prevent audio eavesdropping | “While using app” or “Ask every time”; Quick-Toggle OFF |
| 3 | Location Access | Prevent tracking of your movements | “While using app” or “Ask every time”; use Approximate if supported |
| 4 | Lock-Screen Quick Settings | Blocks unauthorized sensor/setting toggles | Disable “Quick settings when locked” & camera/shortcuts from lock screen |
| 5 | Lock-Screen Notification Content | Prevents sensitive data preview on lock screen | “Hide content” or “Don’t show notifications” on lock screen |
| 6 | Require Password to Turn Off | Prevents thief from powering off and disabling tracking | Enable “Require password to power off” |
| 7 | Anti-Theft & Find My Device + Offline Mode | Last defence if phone lost/stolen | Enable Find My Device; enable “Offline locate/Lock when SIM changed” if available |
Real-World Stats & Case Studies
- A 2018 investigation found that 46% of popular Android apps requested camera access, and 45% requested location tracking. (security.com)
- Android’s built-in Privacy Dashboard (from Android 12) lets you see which apps accessed camera, mic, or location in last 24 hours. (Android)
- In the IIT Delhi study referenced earlier, apps with location access inferred unexpected personal data (room layouts etc) even without camera/mic access. (The Economic Times)
- Case in point: a lost phone enabled recovery because the user had enabled a required password for power-off and enabled remote lock. That combination blocked the thief’s typical immediate disable–power-off move.
What to Check and Maintain Over Time
- Every month: open Settings → Privacy Dashboard and check which apps accessed camera, mic, location in last 24 hours. If something seems off, revoke permission or uninstall the app.
- After installing any new app: check its permissions and set them appropriately before using.
- Ensure your device OS is up to date—security/privilege fixes often include privacy enhancements.
- Use a strong lock-screen credential (PIN 6+ digits, alphanumeric password, or secure biometric). Don’t rely solely on “Swipe” or “Pattern”.
- Enable two-factor authentication (2FA) on your Google account (and any critical accounts) — many attacks start by hijacking accounts rather than the phone itself.
- Regularly test your anti-theft setup: make sure your device still appears in Find My Device, locks remotely, and shows message on screen.
- Be aware of “pre-installed”/OEM apps: some manufacturer apps request broad permissions — review them and consider disabling/uninstalling if you don’t need them.
Frequently Asked Questions (FAQ)
Q: Will disabling camera/microphone permissions break all apps?
A: Not necessarily. Many apps should ask for those permissions only when they need them. If you set camera/mic to “While using app” or “Ask every time”, the app will ask when you start using the feature (e.g., taking a photo) and won’t have background access. If an app “breaks” (won’t work) when you deny permission, ask yourself if you really trust the app—and consider using an alternative.
Q: My phone doesn’t show “Require password to power off” option – what can I do?
A: Not all OEMs support it natively. You can check under Settings → Security → Power menu settings. If unavailable, make sure at least your lock-screen credential is strong and that Find My Device is enabled. Also, some third-party apps or mobile device management (MDM) solutions provide lockdown in enterprise setups.
Q: How do I enable “Offline find” mode on Find My Device?
A: This depends on your device and Android version. On supported devices, open Settings → Security & privacy → Find My Device and look for “Allow this device to be found when offline” or “Lock when SIM changed”. Enabling it helps the phone be located even if it’s offline or the network is disabled.
Q: Can I set location permission to “Never” for all apps and still use maps occasionally?
A: Yes, but then you’d need to temporarily enable location when using the map app and then revert it. A more convenient option: set the map app to “While using app”, and keep all other apps at “Ask every time” or “Deny”. This gives you convenience without broad tracking.
Q: Does turning off camera/mic Quick Settings tile mean no app can ever use them?
A: It depends on the model/Android version. On Android 12+ the quick toggle disables all apps from accessing the sensor (the OS returns blank feed). (WIRED) On older versions it might just hide the toggle but apps could still access the sensor if permission is granted—so always ensure permissions are set appropriately.
Conclusion & Call to Action
In a world where our phones are extensions of ourselves—moving with us, hearing us, seeing us, tracking our location—it’s absolutely critical that we take control of the sensors and permissions instead of giving blanket trust to apps and the device by default.
By implementing the seven key settings above — disabling unused camera/mic access, restricting location use, locking down your lock screen, powering off protections, and enabling robust anti-theft features — you will dramatically reduce your risk of surveillance, data exfiltration, and theft.
Your next step:
Take ten minutes right now. Open your Android phone’s Settings → Privacy and go through each of the seven items above. Adjust permissions, toggle off Quick Settings, enable anti-theft. Consider this your “digital hygiene” checklist — treat it like locking your house door when you leave.
If you found this article helpful, share it with friends and family. Protecting your privacy benefits everyone. And if you’d like a printable or PDF version of this checklist (for tech-workers or non-technical users), let me know—I’d be happy to help.
Stay safe, stay private — your phone should serve you, not expose you.
Thank you for reading — now get into your settings and lock things down. Your privacy is worth it.
